3 days job !
![]()
The headless engine was sleeping for too long (more than a year). It was time to rebuilt it. It's done 4th of may 2003
Let me share you the way i did all that
_______________________________________________________________________________________________
Removing theses two beautiful beasts
Before starting such thing, let you do a favour, buy the ROM (Repair Opération Manual) or the Haynes (less expensive, less detailed) and of course the Kirby's book XJ-S Help (see www.jag-lovers.org) The prurpose of this web page, is not to explain in details how to, Kirby did a great job, it's only to insiste on certain points and give tips.
buy a set of socket, spanner......SAE or UNF (at least for my 78MY)
-Allen key for the "tappet block"
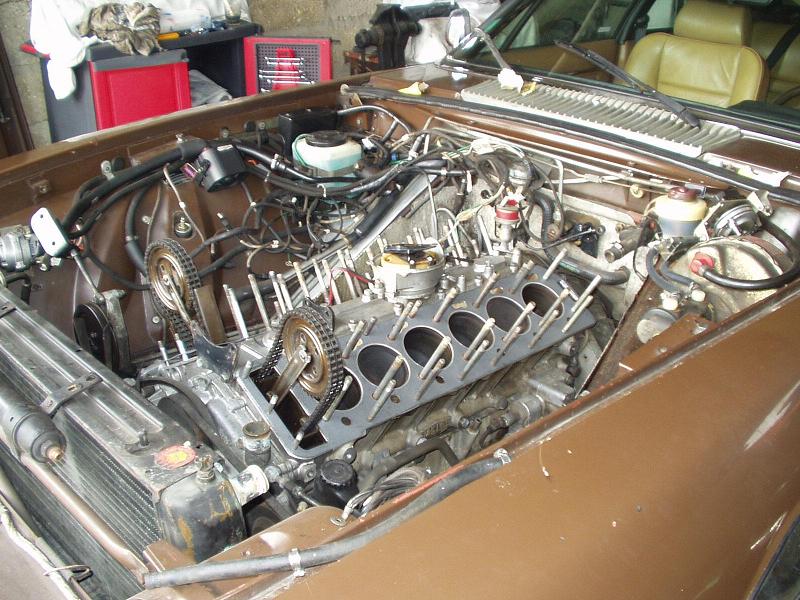
Genesis : I bought this car at a very low price and i knew that i had a lot to do before driving it. I must be mad. Let me precise you that i've been though the same project with my 87Sov where i've removed the head. It's the AJ6 engine, much simpler compared to the V12, but a good start. So for the XJ-S, the starter was dead, the ignition amp was dead., the ECU was dead too, and lot of oil loss on the tappet block.
First step was to clean everything on the visible part. (new plugs and HT leads, air filter, repair ignition amp, used ECu (thanks again Jason Korke from auz) clean the vee part, check distributor, cleaning of the surge tank (plenty of mess there) new petrol filter. New injector hoses. And starter repair (a wire was unsoldered inside) So i cranked the engine, and i V12 was *not* running clean. I had at least one cylinder off. I bought a compression tester and the truth came: no pressure on cylinder B6 and half pressure on 2 cylinders on A side (80psi instead of 200psi). I've confirmed the diagnostic with the valve play ...no play on certain valves (exhaust) .Heads had to come of.
First step, when you start this project, think of the way you will put things that you remove from the engine bay. A trick is to use egg boxes for nuts and screws. in France egg boxes are by 6 and 12. 12 are good for tappet.
Afterwards, follow the Haynes or the ROM:
-Remove the hood (2 persons)
-Remove air filters and box (easisest thing)
-Remove both inlet manifold at the same time (including injectors) don't forget butterflies springs (1h30).
-Remove cameshafts.....warning !!! unlock timing chain tensioner (not trivial at all...) and with a small paint brush, mark the cameshaft and the sprocket (if you don't do that, i wonder how you'll start again the engine.....)(2 hours) when you remove the cameshaft bearing caps, warning not to loose nuts, valve springs make easily fly theses little nuts.
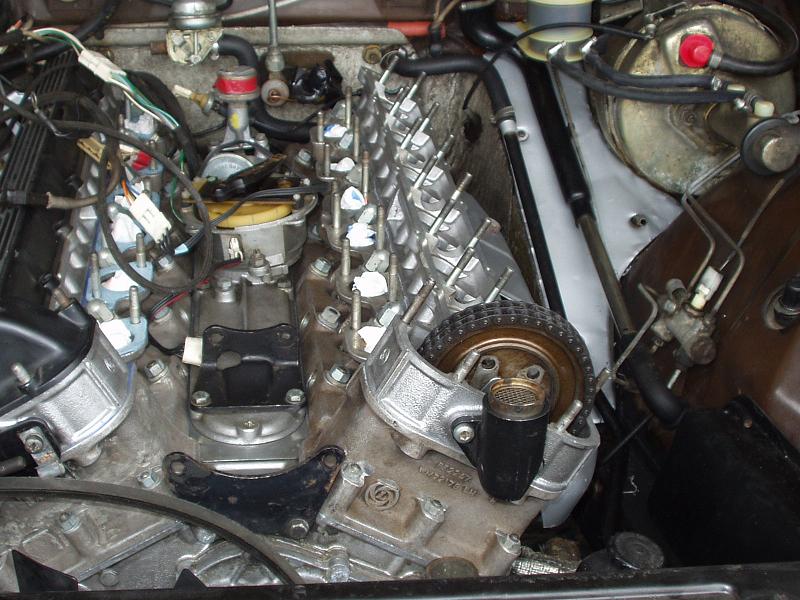
-Remove all the tappets ( oily part...)
-Remove the Tappet Block (half head nuts are not accessible with the tappet block in place,and it's less heavy...you'll understand what i mean) Warning with the banjo bolt (oil feeding, rearside ) there is two little copper washer, very thin.....take care *not* to let them fall.
-Remove exhaust down pipes right after removing the undercar exhaust part (the game is starting with the A side, you have to remove the starter to access exhaust manifold nut) squirt WD40 and all come easily. (easily dos *not* mean quickly !) To make things easier, i've removed the steering rack (oil leak) It's a real mess to put back HP hoses. (from 2 hours to a day job it depends on your dexterity !)
-Remove clim compressor to access head nuts. Warning, it's an heavy part.
After having ruined both hands, the real fun job wiill start:
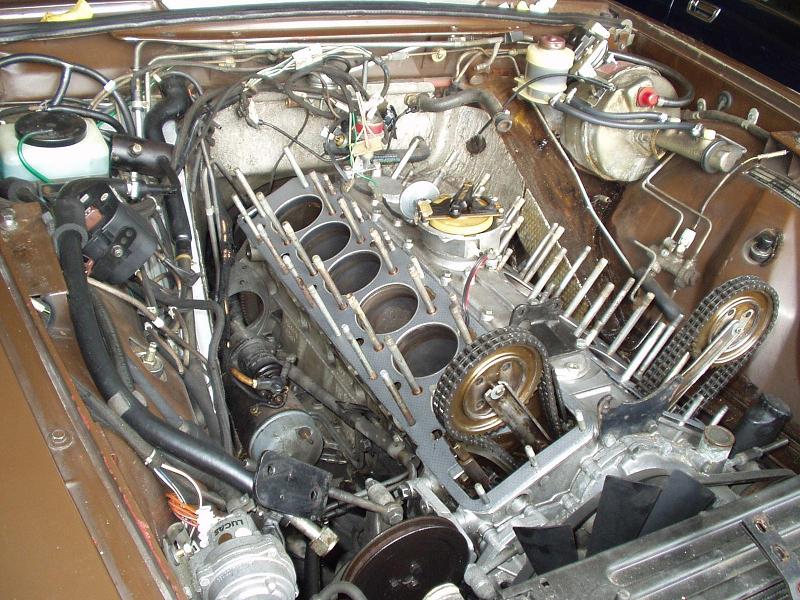
So, you have removed all the domed nuts and normal nuts from both heads, so lift it ! it's written in books. Come on , try at least one time.
So your conclusion is : nothing move. You're lucky ! just like me
You have to know that old cars has been victim of 'barr leaks' So it took me more than an hour per side to remove them. I've been lucky. Some folks were not able to remove them and the engine was lost. The studs are glued with the head? I have a trick:
As i have a 4 post lift, i left the exhaust manifold in place and with a piece of wood between them and the ground, i carfully lower the lift until the head pops of. I did that couple of time to move it about 2 cms. Even using WD40, each millimeter won was an hard battle.
I finally got them. but i sweared a lot.
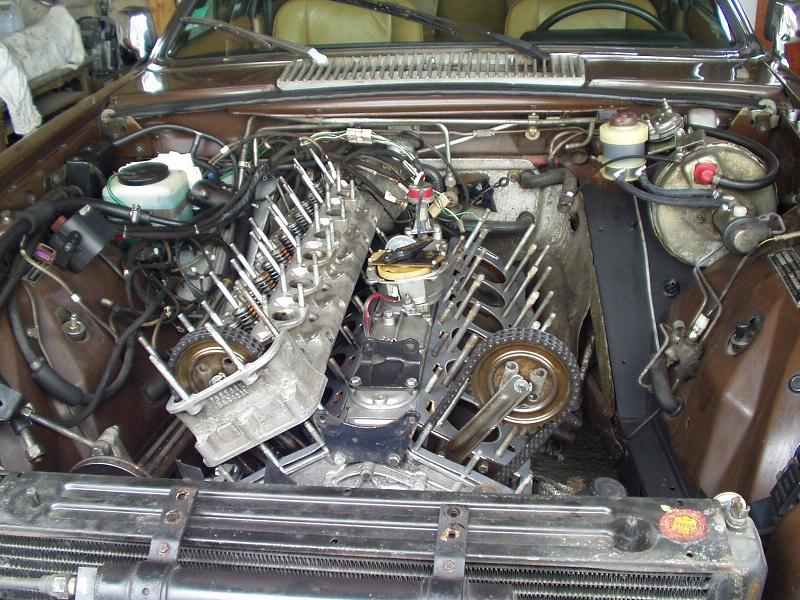
Heads are off ? so what to do with them ?? Clean them or not ? I prefered let them dirty so that the professional how cares of my babies was able to analyse what to do with them. So what he did: all valve seats cleaned and grinded and a light surfacing.
While you're here, what to do ? clean all the lower engine part and change all the coolant hoses. Clean the coolant parts (thermostat housing), new thermostat, new gasket set (upper engine)
heads are back with the following result:
-2 valves inlet spring broken
-2 exhausts valves burnt (A1, B6)
-All the valve play must be checked and of course all the thin valve shims must be changed ....cool, a nice job.
_________________________________________________________________________________________________
REVERSE PROCEDURE:
After more than a year without touching the XJ-S, a doubt is growing, will i be clever enought to remember where each part goes where ?
Let's go ! I'll think about that later;.....
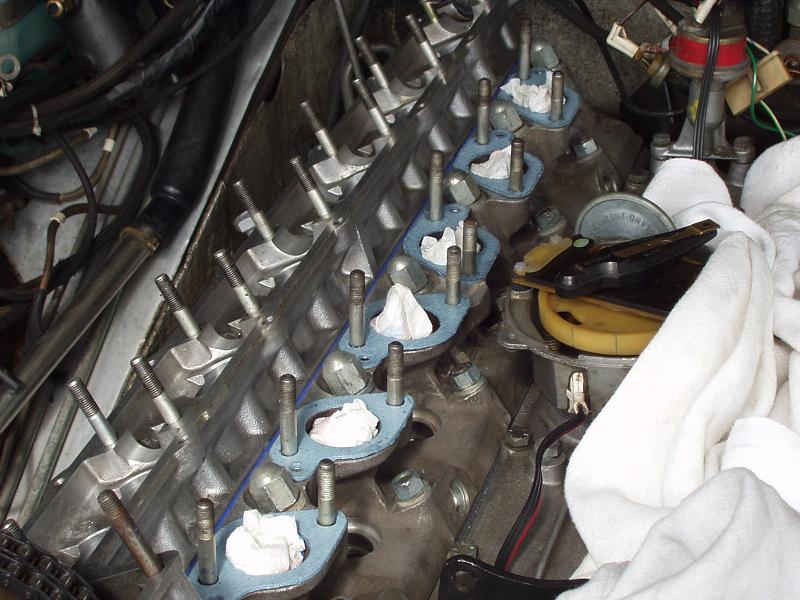
First long step: change inlet valve oil gasket. 12 ! it's a 4 hours job !.....
Clean up the spark plug threads while you have the head off ! (old tooth brush)
So, after having cleaned both studs and liners , you can put your brand new head gasket (They are different ! look at the rear side, holes are different)

You remove once again camshaft and tappet block to make head lighter (it's the third time your're doing that !) and put it back

Here is some pics that show what i'm talking about


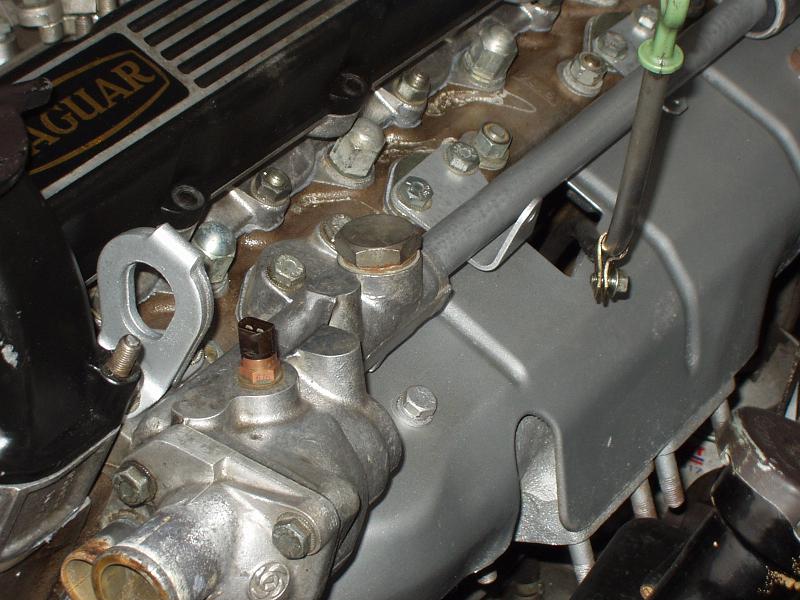
Here you can see exhaust manifold back (and painted). For torquing the head nuts, use a torque wrench and follow Haynes (finish torquing with 87nm)


Underside, it's real mess to access these little nut....lucky guys with little hands.... use extension

Oh ! a heatshield on one side, it's almost easy, thanks jaguar !
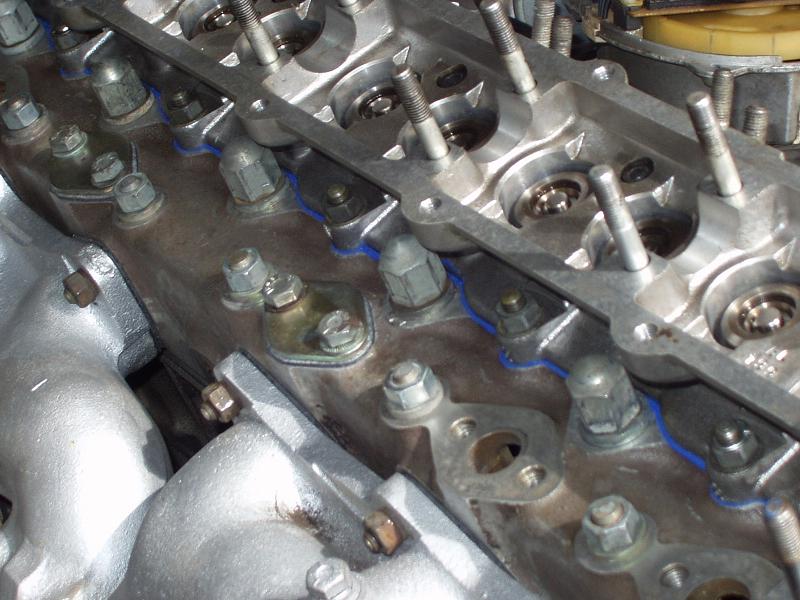
Tappet Block is back with blue sealant Mandatory if you don't want to have oily exhaust manifold and plenty of white smoke at each stop traffic.Warning with the bango bolt and cooper washers.

Camshaft is back, cameshaft bearing caps too. look at the paint mark you did. Otherwise, good luck !

Paint mark and new locking plates
Heatshield is back including thermostat housing (new gasket too here !)
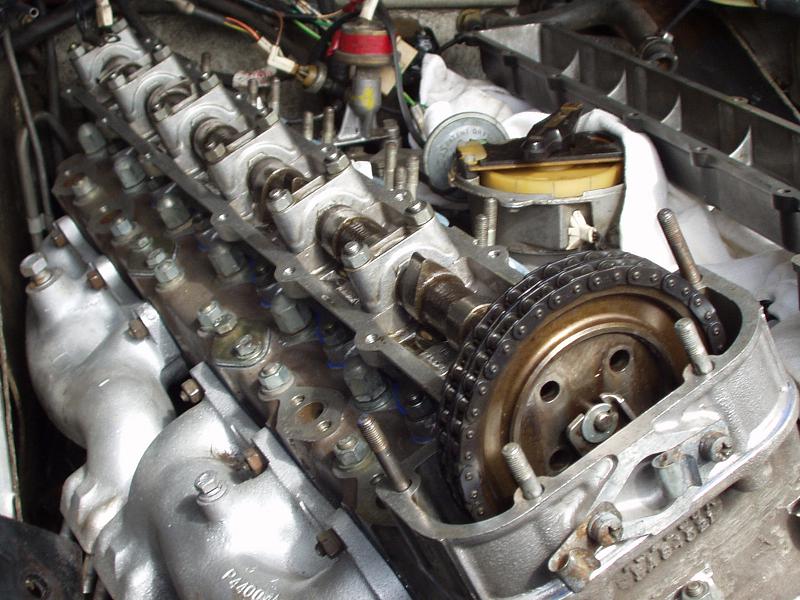
For Head B, it's almost the same

Head back and tappetblock (no more blue sealant, so i uses gray one....smarter)
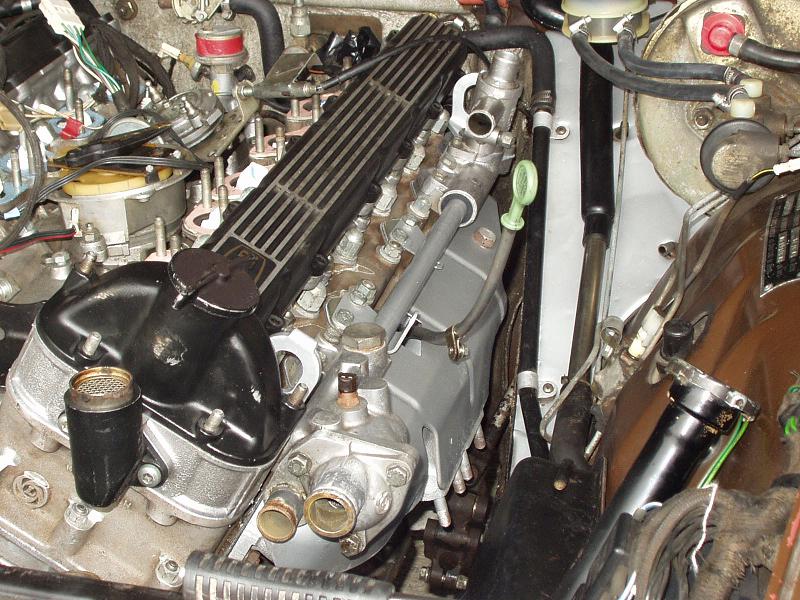
Camshaft happy to be back. Thermostat housing back too (AAV is dead, i've to change it, but it's expensive....)

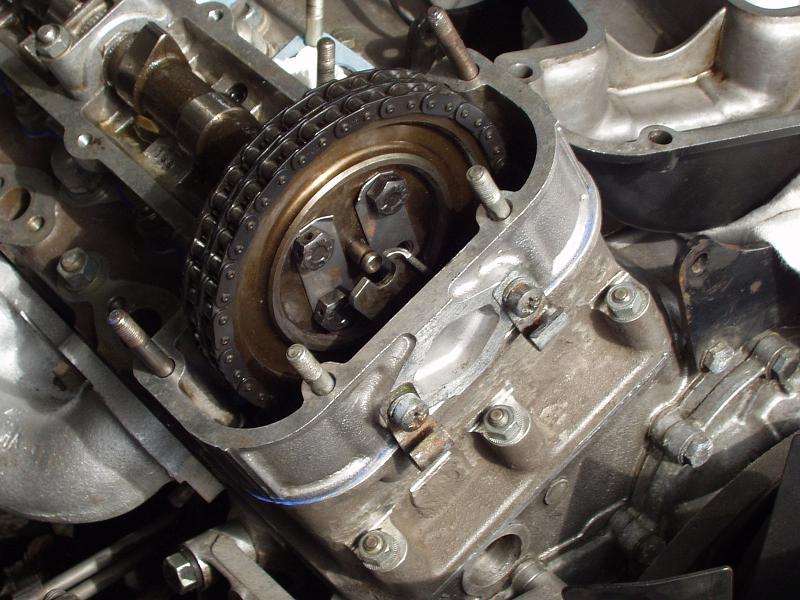
Sealant in detail. Distributor and ignition amplifier back
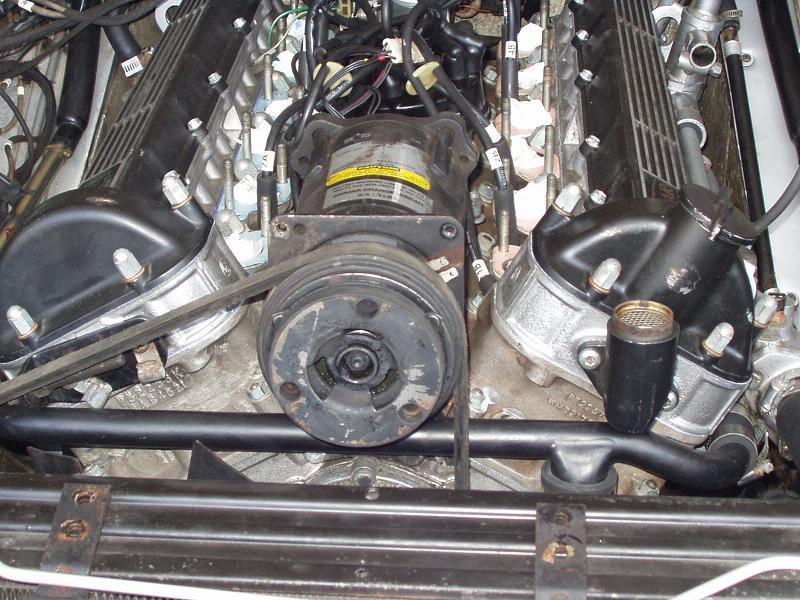

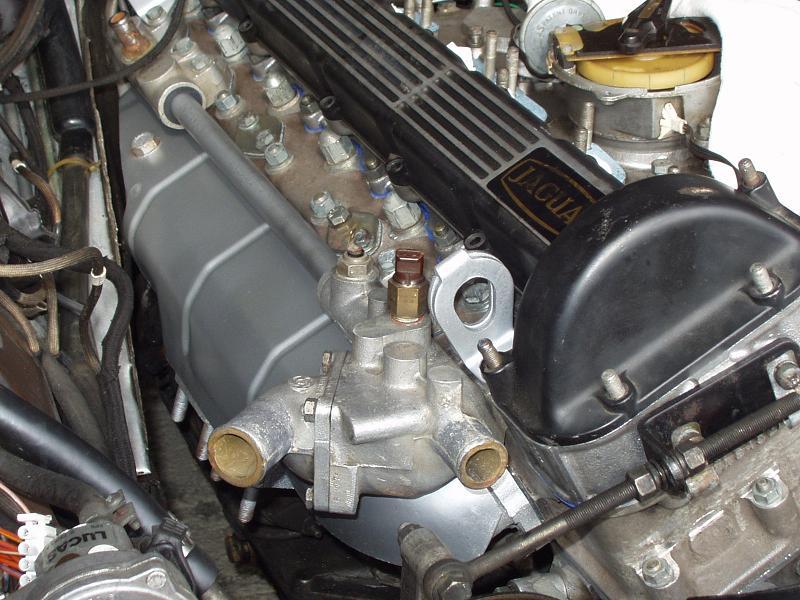
Hop, compressor back, inculding repainted cross over pipe (not much rusted), see the PCV hose cleaned


You're done ! 3 days job, happy to fire the beast (don't forget the 21 litres of coolant) VRAOUM......
If you want more information, don't hesistate, contact me ! email